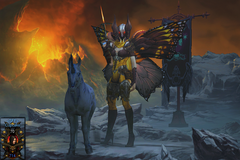
Skyborn. What to say? I'm going to be completely honest and admit that I picked up this game because I was depressed, I wanted to buy SOMETHING, it wasn't too expensive, the story sounded romantic, and the introductory images were cute.

That was April 23rd. 10 days later? The game is finished and I'm sad that I don't know what happens next. I feel like someone should write a book. I feel like someone should write multiple books. While the story is a pretty standard adventure, I loved the characters. Each one of them was unique and had their own distinctive voice, and even the villains had backstory. There was dedication and love behind the making of this game - you can tell. It may not be the most polished thing you'll ever play, and it might not be the most visually advanced game that you can lay your hands on, but it has heart. A lot of heart. And that makes this little game a complete gem in my books.
Oh, and for those of you worried about the romance thing - don't be. While there was a hint of flirting here, an almost declaration of love there, and a bit of a whopper at the end that made my heart cry... there was nothing overt. The blurb, it lied to my aching soul! Oh noes! Anyway - moving on!
Skyborn is a Steampunk fantasy RPGMaker game - it is 2D and turn-based, with an indie-retro feel. The game play and overall look reminded me a lot of Golden Sun and Golden Sun: The Lost Age from the Nintendo Advance (and yes, feel free to take that as a plug if you can find the system or games). It initially centers around Claret, a young mechanic employed at her family's workshop in the Industrial District of Granminster, but the game is far from about her. The game is an adventure that takes us into a world where Human and Skyborn live together but apart, where the two races share a "home" but do not mingle, where the two are far from at peace. After a war that the Humans lost, the Skyborn took over the upper levels of the city and placed themselves in the top echelon of society, viewing the Humans, the "dirt stompers," as beneath them. Humans are treated as little more than crud beneath the Skyborn boots, many are jobless or poor, and the areas they occupy reflect the status that they hold in the eyes of their winged compatriots. The Skyborn, on the other hand, live in a world of pristine streets and haughty attitudes. Many have never seen a human, and most are wary of them due to gossip rather than experience. The half-breeds that result from any love between the two races are arrested, and never seen again - which is what motivates certain people, including our heroes, to take action. In a world of fear and oppression, they set out on a grand adventure to change the status quo and save the half-breeds who are unfairly targeted simply for being born. Simple enough story, great storytelling, fun gameplay, and compelling characters.
And speaking of characters:

A human mechanic working in the family shop - that is, until her brother sells it out from under her... and almost her with it! Claret is tough and independent, takes no crap from anyone, and knows what she wants. She is also kind, compassionate, and helpful, and tries to do what's right - a trait that bites her in the butt when one of the villains uses her kind acts to track her. Oh, and she's a super strong gunner. She's easily your best DPS.

A rich (and seemingly arrogant) human who grew up with a silver spoon in his mouth and daddy's money in his pocket. When he buys Spencer Drydock & Repair from Jake (Claret's brother), he agrees to take her as a wife as well - something she refuses. Time reveals, and we quickly learn that Sully is far more than he seems, and has more heart than initially shows. He is brave, and determined to make a difference. He's the tank of your group.

An employee at Spencer Drydock & Repair, we come to find out that Corwin is a half-breed, born of one Human parent and one Skyborn parent. This means that he's hunted. It also means that sheltering him is a crime. When Jake is arrested for helping him, he and Claret set out to save him and end up on a grand adventure to save all the half-breeds from the Skyborn who confine them. The power he wields from his Skyborn parentage? Healing magic.

An Earthenfey, and the very last of her kind - or is she the first in a new breed of Fey? Chaska is bouncy, excitable, and loves beautiful things. After living alone in the mines for most of her life, shunned for her monstrous claw and otherworldly appearance, she is grateful when Claret shows her kindness. Inspired to leave the safety of the mines behind, she decides to follow Claret on her journeys and explore the outside world.

A Skyborn warrior on a quest for answers, Alda has separated herself from her people and the blood-lust that they seem to harbour. Intrigued by her race's lost history and seeking a kind of redemption for acts in her own past, Alda decides to accompany the others after they happen upon her in the forest where she has made her home. She proves a valuable ally, and boy is she good with her warglaives.
Next up: The Battle System
As mentioned earlier, the battle system is turn-based but your turn is actually based on your SPD stat. The more SPD you have, the better your chances of going first and the more turns you can get in before the enemy gets to attack back. Of course there are some mobs with high SPD, and then you generally get hit fast and hard right off the bat. Unless you know the fight going in, there's no way to predict whether you'll be attacking first or not - if you're playing on Hard, be prepared to die at times because of it. BUT. One good thing with this game (and this does tie directly to the Battle Sytem because when else are you going to die?) is that you don't auto-GAME OVER and start from your last save spot - the game has a Retry function. This came in handy a few times when I just wasn't prepared for that first attack taking out 4/5 of my group, but was able to beat them the second time around because I'd put together a bit of a plan before hitting the Retry button.There is a flee option built into the game, but it isn't really all that useful because a) there are no random encounters (all fights can be seen on the screen and you choose whether or not to engage), and b) every member of your party needs to select flee on their turn before you actually leave battle. The one time I tried this (it was a hard fight and I wanted to prepare before jumping back in), most of my characters died from being attacked while I was waiting to select flee on the other ones. >.> That was special. First and last time trying that. That being said, that really was the only battle system complaint that I had. Otherwise, it's pretty intuitive and easy to use. I'll go over it a little bit below.


The icons above the character nameplates are the options that you have in any given battle. Left to right:
- Weapon icon: Your character uses their base attack, which has no cost and is instant.
- Book icon: Contains all your special skills - some of these have a cost, some don't; some are instant, some take more than a single turn to use.
- Shield icon: Exactly what it looks like - your character sits pretty and shields him/herself for a turn.
- Bag icon: Opens up your inventory so that you can select something for use - potion, herb, etc.
- Tiny boots icon: Flee (must be selected by every character in order to work.)

This is what it looks like when you finish a fight. Honestly, I find it a little (well, a lot) cluttered, and I think that they probably should have opted to remove the battle nameplates if they were going to re-post the character images over them but... really, it's a minor complaint. You see the screen for a couple of seconds and then you're moving on to bigger and better things. And speaking of bigger and better things.
Leveling and skills:
You'd think that the two went hand-in-hand but... not so much. Your characters level up as you move through the game, either by battling monsters or by finding Exploration Nodes:
There really isn't anything else to say about them - it's as simple as that. Walk up and stand on the Exploration Node (shiny X thing) and ding! Free experience.
While the leveling helps to increase their stats and power, it doesn't actually do anything for their skills. Your characters unlock their base skills early on in the game, and have "Class Unlocks" two more times over the course of it. With each "Class Unlock," you're forced to send your character down a specific path and the title they receive is directly related to this choice. Once you complete the Arena/Colosseum, ALL of your characters' potential skills will be unlocked and usable. The following chart is going on memory and hastily jotted notes sooooo... it should be mostly accurate but there may be some mistakes. ¯\_(ツ)_/¯
| Claret | Sullivan | Corwin | Chaska | Alda | |
| Base Skills: | |||||
| -Sniper Shot -Expose Weakness -Napalm |
-Zealous Strike -Taunt -Command Aura |
-Cure -Cleanse -Debilitate -Magic Barrier -Regenerate -Innervate |
-Venomous Claw -Gouge -Marked Target -Adrenaline Rush |
-Mystic Sabre -Immolate -Lightning -Fortify |
|
|
First Unlock: (New Ark) |
|||||
|
Gunner: -Called Shot |
Fencer: -Equalizer -Shockwave |
Templar: -Haste -Circle of Healing -Power Infusion -Lazarus |
Claw: -Throttle -Skull Bash |
Not in your group yet. | |
|
Demolitionist: -Missile Rain - Poisoned Nails - Firewall |
Duelist: -Double Strike -Battlefield Presence |
Apprentice: -Blood Tap -Bloodlust |
Rogue: -Distracting Strike |
Not in your group yet. | |
|
Second Unlock: (From Wax) |
|||||
|
Sniper: -Eliminate |
General: -Inspiration |
Savant: -Renew |
Interloper: -Humiliator |
Blademistress: -Preparation -Lightfury Crusher |
|
|
Technomancer: -EMP |
Field Marshal: -Coup de Grace |
Manipulator: |
Pugilist: -Cyclone |
Vanguard: -Magic Shield -Majesty |
Claret:
- Sniper Shot - Strong tech attack, takes longer to aim than normal attack.
- Expose Weakness - Reduces one enemy's Physical Resistance.
- Napalm - Tech attack on all enemies, inflicts burning.
- Called Shot - Prepare for next attack: Guaranteed critical hit. +50% damage to next special attack.
- Missile Rain - Strong tech attack on all enemies.
- Poisoned Nails - Tech attack on all enemies, inflicts poison.
- Firewall - Increase all allies' tech resist.
- Eliminate - Devastating tech attack on one enemy, paralyzes technological enemies.
- EMP - Devastating tech attack on all enemies, paralyzes technological enemies. Long charge time.
- Zealous Strike - Stronger attack with a charge time. Generates extra Threat.
- Taunt - Instantly increases Threat.
- Command Aura - Increases party's STR and INT.
- Equalizer - High Threat attack, cancels enemy buffs.
- Shockwave - Attack that slows all enemies down.
- Double Strike - Two attacks on one enemy.
- Battlefield Presence - Lower enemy STR and INT.
- Inspiration - Speeds up all allies. Instantly increase Threat significantly.
- Coup de Grace - Three powerful attacks on enemy party. Slight charge time.
- Cure - Heal on ally.
- Cleanse - Wipe any debuffs clean from one ally.
- Debilitate - Magic attack that cuts one enemy's STR/SPD by 50%.
- Magic Barrier - Increase all allies' magic resist.
- Regenerate - Grant all allies Regen.
- Innervate - Grant one ally Innervate. (+10% MP Regen over time)
- Haste - Grant one ally Haste. (+25% AGI/SPD)
- Circle of Healing - Heal all allies.
- Power Infusion - Grants Clear Mind. (+50% INT, -50% MP usage) +50% damage to next skill.
- Lazarus - Revives one ally.
- Blood Tap - Absorb enemy HP over time. A portion of absorbed HP distributed to allies.
- Bloodlust - Grant one ally Bloodlust. (+50% STR, HP lowers gradually but absorb HP with attacks)
- Renew - Heals all allies. Revives all. Cleanses debuffs. Long charge time.
- Cripple - Magic attack on all enemies. Slows enemies down considerably.
- Siphon Life - Absorb HP from all enemies. Increased damage if enemies inflicted by "Blood Tap."
- Paragon - Grant Haste, Regen, Innervate, Clear Mind, +1 All Resists to Self, cleanse all debuffs.
- Venomous Claw - Attack with chance to poison. Slight charge time.
- Gouge - Attack with change to blind.
- Marked Target - Reduces one enemy's Tech resistance.
- Adrenaline Rush - Sacrifice half a turn to gain full Energy.
- Distracting Strike - Redirect threat from this attack to an ally, or double to self.
- Skull Bash - Attack with chance to paralyze. Slight charge time.
- Throttle - Attack with chance to silence. Slight charge time.
- Cyclone - Attack all enemies. Adds bleed effect.
- Humiliator - Strong attack with a chance of a large amount of debuffs at once, removes all positive buffs.
- Mystic Sabre - Magic-based weapon attack. Reduces magic resist.
- Immolate - Magic attack on all enemies, inflicts "Burning."
- Fortify - Defensive stance, lowers damage dealt and taken. Increases threat gained.
- Lightning - Magic attack on all enemies, inflicts "Blind."
- Preparation - Prepare for next attack: Guaranteed critical hit. +50% damage to next attack.
- Lightfury Crusher - Very strong attack. Chance to Paralyze. Long charge time.
- Magic Shield - Nullify magic attacks from enemies.
- Majesty - Inflict -50% STR/AGI/INT/SPD on all enemies.

The levels and titles of my characters at end game with all skills unlocked.
Moving on to: Items and Augments
Skyborn offers you two ways to upgrade your characters and make them stronger. The first is through Items (which permanently alter your characters' stats) and the second is through Augments (which are applied to your characters' gear and weapons, and are changeable). Let's touch on Items first.
You can see how valuable SPD increases are.
There are 6 Items that I came across which make permanent changes to your character's stats - 5 of them can be found in chests and are also purchasable from a Colloseum vendor once you've reached Gold ranking (as seen above), and one is received from a quest. They are the following:
- Roast Beef of Vitality: Permanently increase Max HP by 100
- Carrot of Might: Permanently increase STR by 10
- Onion of Dexterity: Permanently increase AGI by 10
- Mushroom of Magic: Permanently increase INT by 10
- Grapes of Alacrity: Permanently increase Speed by 1
- Experimental Potion: +15 BLD (You can equip 15 more WGH gear without being slowed down)
The Experimental Potion is only received if you complete the quest The Diminutive Chemist and is super helpful. I used mine on Claret so that she could wear heavier gear and put strong Augments on her weapons (since some Augments have a WGH stat to them). It made most sense, since she was my strongest DPS and the only other character who had any issue with balancing Build and gear WGH was Chaska.
As for Augments... I'm not going to make a list as there are way too many and you can find them here anyway. I personally found Spark of Creation (...of Omnipotence - Claret/weapon, Corwin/armour), Puffin Feather (...of Puissance - All/armour), +4 Metal Ingot (...+4 - Most/weapon), Nullifier (...of Nihil - Corwin/weapon), and Diamond (...of Purity - Chaska/weapon) to be the most useful, and those are the ones that I went with on my characters. You can see my character stats and status below.


As you can see, Augments can only be placed on weapons and armour, not on accessories. I have chosen not to go over gear as it's pretty straightforward, but I will point out that the Drakonid Blood Gem (+1000 HP) is a really great choice for an accessory - the HP boost is a huge help.
Crafting:
Kind of a random place to throw this in but the game DOES have a crafting system. I can't go into too much detail because I didn't craft that many items, but the Obsidian Warglaive +2 that Alda is wearing IS a crafted piece and, in my opinion, is better than the other options that she had open to her. I did make a gun for Claret, but I preferred the ones that she currently has equipped. Those were the only two things I made other than random, normal gear at lower levels (which I was disappointed to find was identical to what I could buy from shops). It seems to me that unless you're crafting +1 or +2 weapons, there really isn't any point as you can buy the gear for fairly cheap anyhow.You also don't really feel like you ARE crafting, because the entire thing is text based. You click through what looks like dialogue options, then woohoo, new item. It seems like a kind of bizarre way to go about it - they could have at least used icons like they do for combat. I'm wondering if maybe the crafting system was a last-minute throw-in. In any case, it is what it is.

And we're down to the endgame here folks: Colosseum and Cards
By far the best gear that you can get for your characters is from Colosseum vendors, the Northern Gauntlet in the Venom Depths, and in the endgame (once you've hit the point of no return). The Colosseum fights are tough, so make sure you're wearing the best gear you can and try to have a nice, buffed heath pool. If you reach the point where you can't beat some of the competitors, go level a little bit more and come back. The vendors will start selling to you once you reach Gold ranking, but make sure that you complete all the fights as the last Champion gives you one of the cards you'll need to unlock the Northern portion of the Venom Depths - The Gauntlet. In order to open this area, you must have completed the East, West, and South wings of the Venom Depths, and you must have all 13 cards from the Spades deck in your inventory. These cards are gathered from various locations as you work your way through the game. Keep your eyes open and you should find them, but if you finish up all the areas and see that you've missed any then go back and get them (there are guides that can tell you where the ones that you've missed can be found). Do not skip them. Do not think "meh, I'll be fine without it." The Gauntlet in the Venom Depths is super important for gear - you get five of the huge chests out of it. Trust me, those pieces will really help against Saehral (special, optional boss - she's pretty hard and I got about 10 levels a piece for my characters by defeating her) and the final two bosses.And that's... it.